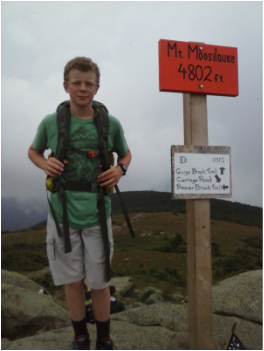
Hike-Swim-Eat Series: Moosilauke-downtown Woodstock waterfalls-Woodstock Inn Station and Brewery9/27/2014
 Moosilauke is a fun and very rewarding climb. You get the high alpine experience with a relatively easy, gentle climb. We opted to do a loop, summitting both South Peak and Moosilauke in the process. There are a number of trails up Moosilauke. Our route was about 8 miles and very manageable. I think this hike would be accessible even for families with younger kids - maybe as young as third grade.
We started at the Ravine Lodge. To get there, take 93 to exit 32. Follow 112 west for about 3 miles to route 118. Follow 118 for about 7 miles to Ravine Road. Ravine Road is a dirt road that will take you to Ravine Lodge. There are bathrooms and a place to fill water bottles at the lodge. From the Ravine Lodge, we took Snapper to the South Peak, then hiked over to Moosilauke, then continued on the Carriage Road and finally back to Gorge Brook Trail for the descent. It was an overcast day so we didn't have great views, but the atmosphere on the summit was still really cool. It's a long walk above treeline, with a huge summit area for hanging out and having a snack...or a nap. It feels a lot like being on top of the Lafayette Ridge or the Presidentials, but is an easier climb, in my opinion. After the hike, we drove back on 112 east until we hit route 3, which runs through Woodstock. Woodstock is one of the cutest towns I've ever seen, full of New England charm and mountain culture. Near the center of town is a charming inn and brewery, the Woodstock Inn Station and Brewery. This has been one of my favorite pit stops over the years after a day of cross-country skiing or hiking up north. Across the street from the inn is a small town park. This is a great place for a quick plunge or ride down a natural waterslide in the Pemigewasset River. It's chilly, but refreshing. Just follow the crosswalk across from the inn, then the path to some stairs. There is nowhere to change or use a bathroom, so you need to get creative in your car, or, if you're lucky enough to be female, purchase and use a "changing room skirt", which provides a clever and effective way to change just about anywhere. Mine came in handy multiple times this summer. And even though there are no facilities,there is fresh, cool water, and flat, sunny rocks to lie on to warm up after a quick dip. The menu at the Brewery is extensive, with a little bit of everything. The men all got burgers, and I got an order of what were, in my opinion, the best sweet potato fries ever, and a fantastic Greek salad. As the name would imply, you can get beers that are brewed on site, as well as fresh-brewed root beer. In my pre-gluten free days, I used to enjoy getting a flight of beers to sample the different brews, and I would highly recommend this route if you enjoy beer at all. Pricing is moderate - plan on $15 per person if you stick to sandwiches/burgers/salads. I've never had a disappointing meal here.
0 Comments
 I am so thankful to one of my husband's cousins for introducing me to this recipe. She made and served these one evening when we were at her house, and they have become a weekly staple at ours. These take an hour - a full hour - to be perfect, so plan ahead. I like to get them ready right when I walk in the door from work and start them baking. Sometimes they are a side dish, others they are the main dish. One son has topped them with chili and cheese, for instance. Sometimes I'll just have these for dinner and not much else.
This is a simple, low-maintenance recipe. The fries are crunchy enough that you can pick them up and dip them into ketchup. They brown up because you add a little bit of sugar when you are preparing them. They scratch the itch for fries, without needing a deep fryer or using oils heated to high temperatures. They don't require stirring or any other type of maintenance - once you put them in the oven, it's just a matter of waiting an hour until they're done. Ingredients 4 Russet potatoes, cut into fries. I like them to be about 1/2 inch thick. 4 Tbsp olive oil 1 tsp salt 2 tsp sugar Preheat oven to 400 degrees. Cut potatoes, and place them into a large bowl. Add remaining ingredients and toss until potatoes are coated. Spread evenly on a baking sheet. Put in oven for 1 hour. Don't stir or disturb in any other way. After 1 hour, remove from oven and allow them to cool for 5 minutes. Serve. *I recommend putting the potatoes on parchment paper on the cookie sheet. Don't make the mistake I made once of putting them on wax paper...you can imagine. Brilliant. * 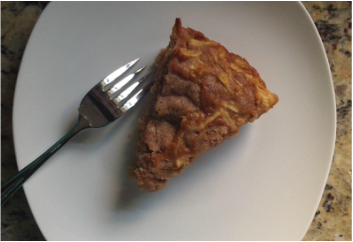
It's apple season in New Hampshire! Last weekend, I picked up a peck of "seconds" at a local orchard for $9. Now the trick is to figure out how to use a peck of apples. I found an apple coffee cake recipe and adapted it to make it gluten free, and also tweaked it to remove the apple chunks that my kids object to. It turned out really nicely - a strong apple-y taste, and very soft and moist. This is gluten-free and potentially dairy free, as detailed below.
Ingredients 1/4 cup butter 3/4 cup brown sugar 1 large egg 1/2 cup yogurt (use 1/2 cup cultured vanilla coconut milk, Greek style, to be dairy free) 1 tsp vanilla 1 cup gluten free flour blend, or 1/4 cup tapioca starch, 1/4 cup potato starch, 1/2 cup brown rice flour, and 1/2 tsp xantham gum 1 tsp cinnamon 1/2 tsp baking soda 1/4 tsp salt 3 cups grated apples (I used McIntosh) 1. Butter a 9x9 baking dish or a 9-inch pie plate. 2. Mix together butter, brown sugar, and egg until smooth. Add yogurt and vanilla and combine. 3. Combine dry ingredients (flour through salt) in a separate bowl, then stir into wet ingredients. 4. Fold in grated apples. Pour into prepared pan. Bake at 350 degrees for 35-40 minutes, or until set. This is very apple-y, so a toothpick test might look underdone, but it probably is fine. Let it set up for 10-15 minutes before cutting. This is one of my favorite quick school night dinners. It is simple, yummy, and can be ready in about 30 minutes from the time I walk in the door. This recipe uses red curry paste - I buy the Thai Kitchen brand - and fish sauce. These will keep great in the refrigerator and you will get about 5 meals from one jar of paste. I follow the recipe on the curry paste jar, but have doctored it up a bit as well. A word on fish sauce: it stinks. Like really stinks. But it's supposed to, so don't throw it away, thinking you got a bad batch. It gives Thai food its distinctive flavor, and once it's simmered with all of the other ingredients, you don't notice it. I promise. Just don't put too much in. This recipe is easily vegetarian- or vegan-ized. Just use tempeh or tofu in place of the chicken. Or just stick with veggies - I have thrown in peppers, cauliflower, green beans, potatoes, peas, broccoli...most veggies pair very well with the flavors in the sauce. If you object to the idea of fish sauce, use a tamari sauce or soy sauce instead, or just throw in some extra salt. It won't be the same, but it should still be tasty. I have often thought that a white flaky fish or shrimp would work really well in this recipe, but I haven't tried that yet.  Ingredients:
1 pound of chicken, or about 2 cups chopped meat substitute of your choice 1 onion, chopped Olive oil 2 Tbsp grated fresh ginger 2 cloves garlic, minced 2 cups of chopped vegetables of your choice 1 can coconut milk 1 Tbsp red curry paste 1 Tbsp fish sauce (or 1/2 tsp salt) 1 Tbsp brown sugar 1. Start jasmine rice cooking on a separate burner. 2. In a large skillet, heat oil over medium heat. Add onion, ginger, garlic, veggies, and chicken. Saute gently for 10 minutes. 3. Pour in can of coconut milk. Add curry paste, fish sauce, and brown sugar. Stir to combine. 4. Allow mixture to simmer gently for another 15-20 minutes, stirring occasionally. Serve over rice. 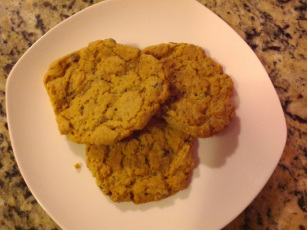 Not much to say about this recipe, besides that it is simple (5 ingredients), delicious, a crowd-pleaser (just don't tell people they're gluten-free), and highly adaptable. The original recipe - and the one I usually make - calls for peanut butter. I found it on the Whole Foods site a few years back while searching online for a GF peanut butter cookie recipe. Try it with any form of nut butter and see what happens. Add chocolate chips, or don't. Throw in some oats or some chia seeds. The nutritional information for these cookies will rival any granola bar or protein bar that you might buy at the grocery store, but you get to have control over the quality of the ingredients. These are great for dessert, or thrown into lunches, or stashed in a backpack to eat during a long hike. These are not crumbly or saliva-sucking like some GF baked goods can be.
Ingredients: 1 cup nut butter (use a "natural", lower sugar form if possible) 3/4 cup sugar (or equivalent baking sweetener of your choice) 1 egg 1 tsp vanilla (this is actually optional) 1 tsp baking soda Variations: -Add chocolate chips -Use almond butter and add white chocolate chunks and dried cranberries or blueberries -Add oats, seeds, or chopped nuts Combine ingredients. Drop by spoonfuls onto cookie sheet. No need to flatten. Bake at 350 degrees for 8-10 minutes. They will still look a little underdone at this point, but take them out anyway and let them cool. If you overbake them, they get dry and crumbly. 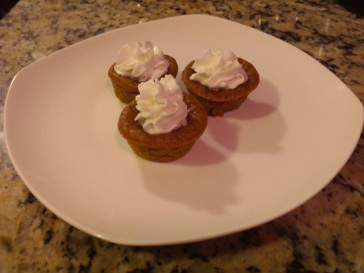 Fall time = pumpkin time, right? Pumpkin is not only delicious, but also full of nutrients including vitamin A, B vitamins, and minerals such as copper and potassium. I love pumpkin baked goods, but rarely bake them myself anymore. I saw a recipe shared on Facebook this week that looked so delicious, I thought I might try it. It was a "conventional" recipe, but I have adapted it to be dairy- and gluten-free.
These muffins come out like the inside of a pumpkin pie, so if you don't like super moist cakes/muffins, this probably isn't the recipe for you. They are firm enough to hold onto and eat like muffins, but just a tad gooey. I LOVED them, as did everyone in the family, but I can imagine that there are some people who would not enjoy their texture. Saturday turned out to be a lovely fall day, cool and crisp, with some rain in the mix later in the day. It was a perfect day for baking, especially something involving pumpkin and cinnamon. I found that I had already packed my muffin tins away, but still had a mini-muffin tin to use, so that's what I did. Turns out they packed really well and tasted great at the summit of a mountain today, and were much easier to share due to their small size. This recipe would be easily "paleo-ized" by using almond meal or coconut flour in place of the GF flour I chose. Ingredients Pumpkin puree, make your own or buy a 15-oz can (I bought the can.) 3/4 cup of your favorite sweetener (I used 1/2 cup white sugar and 1/4 cup brown sugar) 2 large eggs 1 tsp maple syrup (original recipe calls for vanilla but I was out...) 3/4 cup coconut milk (from a can, stirred well before measuring) 2/3 cup flour (I used a GF blend that has xantham gum included, but remember to add 1/2 tsp xantham gum in addition to your favorite GF flour if not in the mix) 1 tsp cinnamon 1/2 tsp nutmeg (if desired) 1/4 tsp ginger (if desired) 1/4 tsp salt 1/4 tsp baking powder 1/4 tsp baking soda Preheat oven to 350 degrees F. Butter 24 mini muffin tins (or 12 regular sized muffin tins). Pour batter into tins until about 2/3 full. Bake for 25-30 minutes, checking occasionally for doneness. These will be very, very moist, but if you check them and they still seem too underdone, put them in for 5 minute intervals. Let stand and cool for at least 20 minutes, then remove from pan and serve. You can top them with whipped cream, or whipped coconut cream if you are dairy-free. How to make coconut cream, you ask? Buy a can of coconut milk (NOT "lite"). Scrape the solid layer off the top and add to a mixing bowl. Add about 1 Tbsp sugar. Whip with an electric mixer on high speed for several minutes, until peaks form in the cream. Serve as a topping for your pumpkin pie bites. 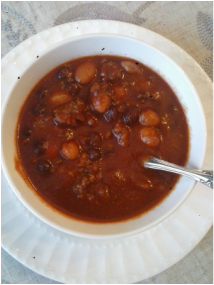 This is a family favorite, and also one of those recipes that (apparently) my kids' friends go home and tell their parents about. It has a short list of ingredients and goes together quickly. It's best if it simmers for a long time, of course, but can also be ready within 30 minutes. This is a smooth chili - no chunks of tomatoes or peppers. I have found that kids like it better that way.
This works well in the crock pot, too. Just be sure to put a few extra cups of liquid in if it will be left all day. Ingredients 1 onion, chopped 2 cloves garlic, minced 2 Tbsp olive oil 2 Tbsp chili powder 1 Tbsp cumin 1 tsp salt 1 lb ground beef 3 cups cooked beans (I typically use black and kidney, with more black than kidney) 2 cups crushed tomatoes or tomato puree 1. In a large pot, heat olive oil over medium heat. Add onion and garlic. Cook for 5 minutes, until soft. 2. Add chili powder, cumin, salt, and ground beef. Heat for 5 minutes, using a spatula to break apart the ground meat into smaller particles. 3. Add beans and tomato. Stir well. Turn heat down to medium low. Cook on a low simmer for at least 15 minutes more, but allow to simmer for a few hours if possible. Sometimes I add 1/4 cup of red wine early on to give it a richer flavor. As it simmers, add water as needed, and to meet your preferences for thin versus thick chili. 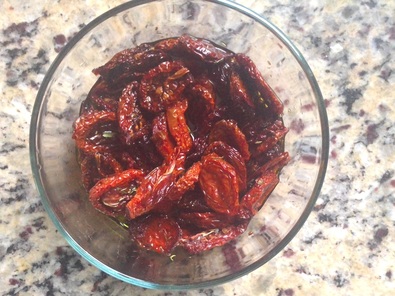 I have way more tomatoes coming out of my garden than I can deal with right now. In years past, I would rinse them, cut off the stems, put a few cups into storage bags, and store in the chest freezer in the basement. This is a great way to store tomatoes if you have the freezer space. They can be thawed and used to make soups and sauces throughout the year. This year, however, being in the throes of a home sale/purchase, and facing an impending move, I had already defrosted and cleaned out the freezer, so that wasn't an option. Also, I am not motivated to process and can tomatoes right now, what with the start of a new school year and the above-mentioned move. I have shared some at work, but I am picking more and more every day - more than we can possibly consume. It occurred to me the other day that sundried tomatoes are delicious, take up small amounts of space, can be stored for long periods of time, and are probably pretty easy to make. The photo to the left shows my finished product. 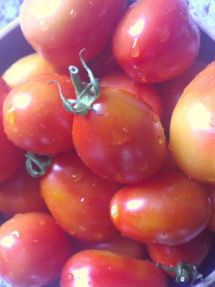 I started with a lot of freshly-picked Roma tomatoes. I cut them in half and placed them on a cookie sheet, insides facing up as below. I then put them in a 250 degree oven for about 4 hours. I turned the oven off and let them sit overnight. In the morning, they looked like the tomatoes in the photo below. They weren't quite dried enough, so I put them out on the deck before I left for work in the morning. (It was a hot, sunny day.) When I got home 10 hours later, they were drier, but still not completely dehydrated. I put them back into a 250 degree oven for another hour that evening, and they were perfect. This process obviously involved a lot of trial and error. I think when I do this again, I will leave them in the oven for 6-7 hours at 250 degrees and that should finish them nicely. If I were home during the day, and if the weather were right, it would be fun to try drying them in the sun only, but it seems that it would take longer, maybe even several days. Once finished, I placed them in a glass container and mixed them with some olive oil, basil, a pinch of salt, and bouquet garni. They can be stored in the fridge this way for several months. Alternatively, you can leave them dry and store in a sealed bag at room temperature. 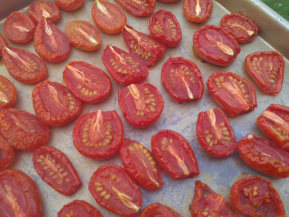
 This summer in mid July on one of my hikes with a gaggle of adolescent boys, we happened upon a huge area of wild blueberries. It was on the less popular side of Mt.Major, the trail that we had chosen to descend down. Between the five of us, we managed to pick 4 cups (enough for a pie) in less than 30 minutes. Being that it was a super easy hike and that we were only a mile from the car, we emptied out two Nalgene bottles of water and replaced it with blueberries. I promised the boys a pie with the four cups that we picked. Wild blueberries are so much tastier than cultivated berries, much smaller and very sweet. I opted to prepare an uncooked filling, placing the berries into the pie raw and letting them cook along with the pie. It was delicious.
Gluten-free pie crust is never quite the same. It doesn't get flaky like pie crust made from wheat flour. You can see in the photo that it was hard to work with - bits of it were pieced on and pressed into place after placing it over the pie. But this was a decent crust, compared to others I have tried. And the sweet, berry filling more than compensated for what the crust lacked in flakiness. In terms of flour blends for the crust, I have used a combination of brown rice, potato starch, and tapioca starch. But feel free to substitute a blend, such as King Arthur's or Pillsbury (I found their GF flour blend in the "regular" baking section at Hannaford a few weeks ago, and it's cheaper per pound than buying the separate flours. It also includes the xantham gum.) You can substitute 2 1/4 cups of flour blend for the 3 flours below. Just note whether or not xantham gum is included. If not, you will need to add it per the recipe. Crust: 1 1/4 cup brown rice or white rice flour 1/2 cup potato starch 1/2 cup tapioca starch (also called tapioca flour) 2 Tbsp sugar 1 tsp xantham gum 1 cup butter, chilled 8 Tbsp cold water - ice water is even better 1. Mix flours, sugar, and xantham gum together. 2. Take cold butter and grate it using a regular cheese grater. Add to dry ingredients and stir until well-distributed. 3. Add 8 Tbsp of cold water and mix using a fork, then, in a kneading fashion, use hands to finish it off. If it remains crumbly, add another Tbsp of water. (My grandmother swore that her pastries came out so nicely because she always had cold hands, so I will sometimes run my hands under cold water prior to this step.) 4. Form into two balls, wrap in plastic wrap, and refrigerate for 1 hour. 5. Roll out one half on wax paper, using tapioca starch as a flour to prevent sticking to rolling pin. Using the wax paper, transfer the crust to the bottom of a pie plate. 6. Prepare berry mixture by combining 4 cups of blueberries, 2 Tbsp cornstarch, 1/2 cup sugar, pinch of salt, and 2 tsp lemon juice. Toss together gently in a mixing bowl, then pour mixture into pastry-lined pie plate. 7. Roll out second crust and gently drape over the top, trimming and crimping edges as needed. Preheat oven to 375 degrees. Place pie on the lowest rack position. Bake for 50-60 minutes, until crust is golden and filling is thick and bubbling. (From experience, I would recommend placing a cookie sheet underneath the pie plate to catch juices that might overflow. I HATE cleaning the oven.) Let stand for at least 1 hour before serving. 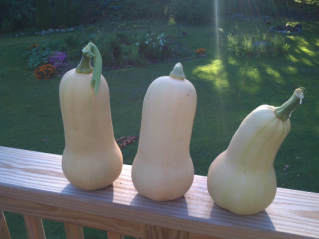 I didn't intend to grow butternut squash this year. I find that the vines take up way too much of my limited garden space, and for the past two years, my squash plants have gotten a strange fungus which spreads to other plants. This year, however, I must have had one rogue seed that managed to germinate and a vine cropped up. I couldn't bear to cut it back - it was so green and healthy - and so I have this huge butternut plant growing all over my garden. Surprisingly, this one vine has remained very healthy and has produced more squashes so far than my multiple plants produced last year. I have had one casualty to the lawn mower (it was being pushed by a 12-year-old), but I have 3 that have ripened, and at least another 5 on the vine that should mature in the next few weeks. I found this recipe on the back of a can of coconut milk, and have adapted it slightly.
Ingredients: 1 large onion, chopped 2 cloves garlic, minced 2 Tbsp grated fresh ginger 2 Tbsp olive oil 2 tsp ground coriander 1 tsp ground cumin 4 cups of chopped butternut squash (fresh or frozen) 1 can coconut milk 4 cups of broth (vegetable or chicken) or water, with 1 tsp salt added Salt and pepper to taste 1. In a large pot, combine the olive oil, onion, garlic, and ginger. Cook over medium heat until onions are translucent, about 10 minutes. 2. Add coriander and cumin. Cook for another 5 minutes, until aromatic. 3. Add broth and chopped squash. Simmer gently for 30 minutes, or until squash is tender. 4. Using a blender (traditional or immersion will work) blend squash/broth mixture until smooth. Return to medium heat. 5. Add coconut milk. Simmer for another 5 minutes, or until warm. Garnish with fresh cilantro if desired. |
AuthorI'm Emily. I currently work in online education management, but I also have a Masters degree in Nutritional Sciences (my true passion). In addition, I am a mom, cook, avid reader, novice gardener, and enjoy all kinds of outdoor activities. On my blog, you will find articles on food, fitness, weight management, and eating issues. ALL recipes on my blog are gluten-free. Many are low-carbohydrate. Most are grain free. Enjoy! 
Categories
All
Archives
June 2019
|